Tuesday, 13 November 2012

Very Yellow 3 egg yolk Cake


I was planning to make some macaroons with 3 egg whites. 
Obviously there would be 3 leftover egg yolks.  I thought to myself, what could I do with the leftover egg yolks?  Making mayonnaise, extra rich pastry, carbonara spaghetti, etc. ... but I wanted to make a cake.  
So I searched to find out if there was any recipe which only uses egg yolk because I didn't want to waste the leftover egg yolks. Then, I came across the cake called "yellow cake" which doesn't require egg white at all. I amended the recipe for my 3 egg yolks and created a recipe for a very yellow lemon cake. 
I also added zest of an orange to the batter to make citrus flavoured cake. Then, I made lemon syrup with fresh lemon juice and sugar, and poured the juice over the cake when it was still warm in the cake tin.  
The resulting cake was unexpectedly good, very moist and yet light and fluffy in texture.  
Ironically, I spectacularly failed to make macaroons. Everything went so wrong and it was absolutely disastrous.  So I ended up wasting the precious ingredients of the macaroons as most of them were badly stuck to the baking paper and I couldn't remove them.
Well, I have to admit that I was defeated by macaroons, but I was rescued by this leftover cake. 
However, I won't give up making macaroons. So watch this space. :)

Ingredients
  • 150g  plain flour
  • 1.5 tsp baking powder
  • ¼ tsp salt
  • 85g butter (or low-fat spread)
  • 130g sugar
  • 3 egg yolks
  • 120ml milk
  • 1 tsp vanilla essence
Method
  1. Preheat the oven to 180 C (350 degrees F).
  2. In a bowl sift or whisk the flour with the baking powder and salt.
  3. In the bowl of your electric mixer, or with a hand mixer, beat the butter until soft and creamy (about 1-2 minutes).  Gradually add the sugar and beat until light and fluffy (about 3-5 minutes).  Add egg yolks, in two batches, beating well after each addition. Add the vanilla extract and beat until combined.
  4. With the mixer on low speed, alternately add the flour mixture (in three additions), and milk (in two additions), beginning and ending with the flour.  
  5. Pour the mixture into the cake tin. Bake 22 to 28 minutes or until a toothpick inserted into the centre of the cake just comes out clean and the cake springs back when pressed lightly in the centre.  

Sunday, 11 November 2012

low-fat Tarte au Citron


I have been searching for a low-fat lemon tart recipe for quite sometime. Then, I found a "relatively" low-fat recipe for my favourite lemon tart from the BBC GoodFood website
I amended the recipe for my convenience. As you see in my version below, there is no waste of egg yolk or egg white. I sometimes get annoyed when I come across a recipe that has lots of egg white or egg yoke left over.   This is a very tangy, incredibly lemony tart. I love a lemony flavour, so it suits me very well. :) 


Ingredients 
For pastry
  • 50g butter , cut in pieces
  • 140g plain flour
  • 1 tbsp icing sugar
  • 1 tbsp vegetable oil
  • 1 egg yolk
For filling
  • 3 eggs , plus 1 egg white
  • 140g icing sugar , plus extra for dusting
  • 2 tbsp finely grated lemon zest (about 3 lemons)
  • 125ml lemon juice (from 3 lemons plus bottled lemon juice)
  • 200ml tub half-fat crème fraîche

Method
  1. Rub the butter into the flour until the mix looks like fine breadcrumbs. Stir in the icing sugar, then make a well and use a round-bladed knife to stir in the oil, egg yolk and 1½-2 tbsp cold water until the dough comes together. Without overhandling, gather into a ball. On a lightly floured surface, roll out so it fits a 23 x 2cm loose-bottom flan tin. Ease the pastry into the tin, then trim the edges by rolling the rolling pin over the top. Press the pastry into the flutes so it sits very slightly proud of the edge (this extra height helps in case of any shrinkage). Lightly prick the pastry base with a fork, then chill for about 10 mins. Heat the oven to 190C / 170C fan / gas 5.
  2. Meanwhile, make the filling. Beat the eggs and egg whites together with a wooden spoon until well mixed. Sift the icing sugar into a bowl, then gradually beat in the eggs. If the mix is at all lumpy, simply beat with a wire whisk. Stir in the lemon zest and the juice. Leave to stand so the lemon flavour can develop.
  3. Sit the chilled pastry case on a baking sheet. Line with baking parchment and baking beans and bake blind for 15 mins until well set. Carefully lift out the beans and paper, then bake the pastry case for another 3-5 mins until the base is cooked and pale golden. (I pre-baked the pastry without using baking parchment and baking beans for 15 minutes). 
  4. Strain the lemon mixture through a sieve. Beat the crème fraîche in a medium bowl until smooth, then slowly stir in the lemon mix until well blended. Transfer to a jug, then carefully pour two thirds into the warm pastry case. Place in the oven with the oven shelf half out, pour in the rest of the filling, then carefully slide the shelf back in. Reduce the heat to 150C/130C fan/gas 2. Bake for 25-30 mins until barely set with a slight wobble in the middle. Cool for about 1 hr, then serve with a light dusting of icing sugar. Best eaten the same day.


Wednesday, 7 November 2012

Lemon Iced "Chubby" Fingers

Here is another way of presenting rich sweet dough ... very wet and sticky dough .... 
... and it was quite difficult to shape the dough into "fingers." 
As you see they are more "chubby fingers" than they really should have been, but they tasted good.... 
So, it's all good, isn't it? 

 Ingredients

  • 255g strong white flour
  • 250g plain flour
  • 125ml warm water
  • 125m warm milk
  • 1 x 7g sachet fact-action dried yeast
  • 1 tsp fine sea salt
  • 50g caster sugar
  • the zest of 1 lemon or orange
  • 1 free-range egg, beaten
  • 50g butter, cut into cubes
  • For icing 
    • 50g icing sugar
    • ½ lemon, juice 
Method

1.     Place the flour, water, milk, yeast, salt, sugar and lemon (or orange) zest into a large bowl and mix. 
Add the beaten egg and butter and continue to mix until the mixture comes together as a sticky dough.

2.    Tip the dough onto a lightly floured work surface and knead for ten minutes, or until the dough is smooth and elastic.

3.    Lightly oil a bowl with a little of the vegetable oil.

4.    Place the dough into the bowl and turn it until it is covered in the oil.  Cover the bowl with cling film and set aside in a warm place for one hour, or until the dough has doubled in size.

5.    Lightly grease two baking trays.

6.    Knock the dough back to its original size and turn it out onto a lightly floured work surface.  Divide the dough into twelve portions, shape them into long oval and place onto the baking trays. Ensure the buns are well spaced. Cover with a tea towel and set aside to prove for 30 minutes.

7.    Preheat the oven to 220C/425F/Gas 7.

8.    Bake the buns in the oven for 10-15 minutes or until well risen and golden-brown.  Remove the buns from the oven and set aside to cool on a wire rack.

9.    Meanwhile for the icing, mix the icing sugar and lemon juice (and food colouring if you like) together in a bowl until smooth.

10.  Once the buns have completely cooled, spread the icing on top of them and set aside until the icing has hardened. Decorate with orange/lemon peal.  


Sunday, 4 November 2012

Apple tart tatin with rough puff pastry

I have been baking a lot of upside-down cakes recently with some burnt caramel.... it's a bit tricky to make  caramel "just right." The difference in cooking time between undone caramel and burnt caramel is literally seconds. Anyway, here is another attempt to make caramel. This time, I made tart tatin with rough puff pastry. The caramel turned out almost right. :)

I found Mary Berry's technique, which grates butter and lard with a cheese grater very useful. Both butter and lard should be ice cold to do a good grating job in order not to melt the fat. I put the butter and lard in the freezer for a while before using it. I followed Mary's apple tart tatin recipe for this.
Just came out of the oven                           Upside-down... hurray


Baked as a dessert for the dinner party 16.11.2012
Success. :) 


Wednesday, 31 October 2012

Focaccia ... the real thing

Making Focaccia....
'Nobody said it was easy. No one ever said it would be this hard."
I had been really curious about making authentic focaccia though I had heard that it was notoriously difficult. I baked "my take" on focaccia which is really normal bread made flat sprinkled with some olive oil. However, I thought it was about time I tackled the famous Paul Hollywood's focaccia.      
As I expected, the dough was terribly WET and STICKY... When I looked at Paul Hollywood's recipe and watched last year's GBBO master class, I thought to myself, the dough recipe couldn't be right.
400ml of cold water for 500g of strong flour?? The ratio of flour and water is totally unconventional... What is more, his recipe told me to add 2 sachets of yeast which was twice as much as I use for making a 500g flour loaf.  So, I compromised by trying the "wet consistency", but sticking to my instinct and adding only one sachet of yeast. .... However, I followed the rest of his instructions. The dough was an absolute nightmare to work with throughout the process, though I spread plenty of olive oil on the worktop following Mr Hollywood's technique. Perseverance was required . 
Then, the dough needed to rise. It took more than 3 hours for the dough to double in size....Phew... but I managed to get to that stage. I cut the sloppy dough in two and placed them on two baking trays and waited another hour to prove the dough. Then, finally I pressed the dough with rosemary to make some "focaccia dimples". I also sprinkled some more olive oil and salt and then my long suffering dough was finally ready to go into the oven.... And here they are. They tasted lovely. 
Was it worth such a hassle? ..... Well... probably, YES. 


Here is the video of how to make focaccia from GBBO 2011


Monday, 29 October 2012

Chelsea Buns

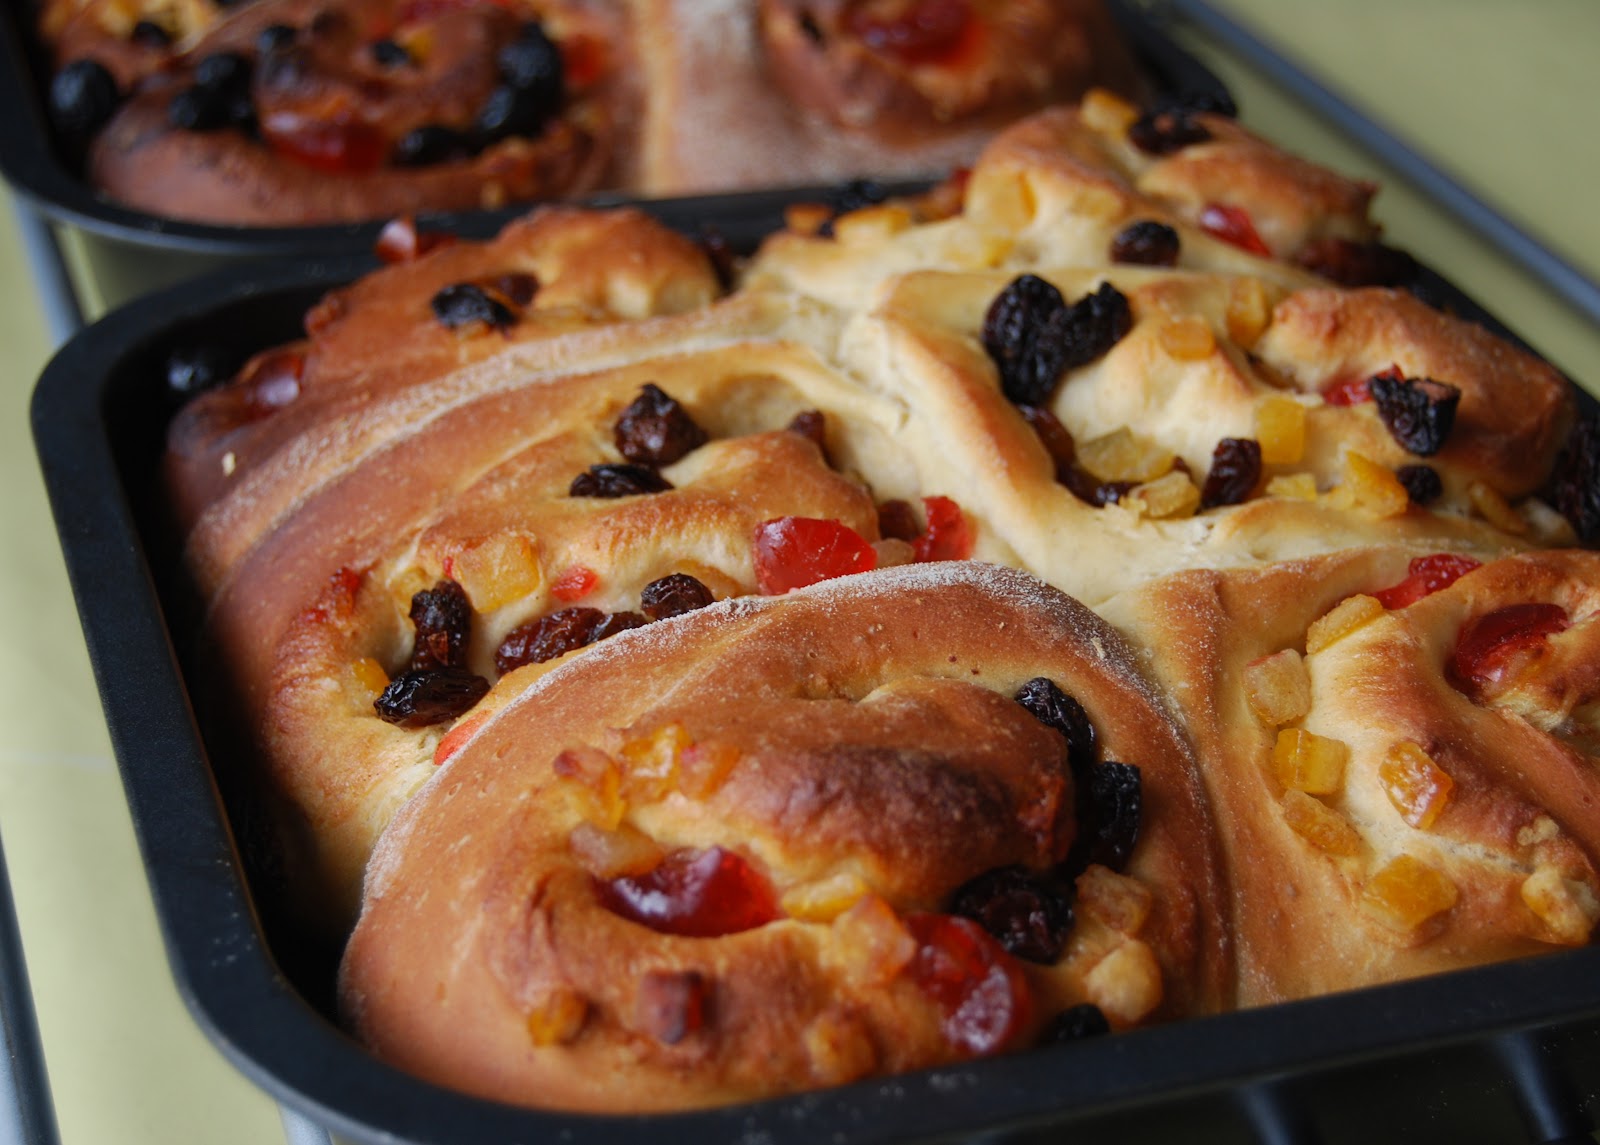
I have done it. Proper Chelsea buns... no cheating... I followed a recipe of the famous Paul Hollywood. It was my first time making "rich sweet dough" and it was a bit of nightmare to begin with, as the dough was really wet and sticky. Perseverance. I kept kneading though the dough seemed to be stuck to my hand forever. However, my hard work paid off as the dough gradually became pleasant to work with. Paul's recipe on BBC Food site said the the butter should be melted in a saucepan with milk. I was a bit confused because he put all the independents (flower, sugar, yeast, salt, egg) together in the bowl, then poured in the warm milk on the BBC show "The master class of GBBO." So I followed his GBBO method and put all the ingredients in the bowl then, poured in the warm milk. I used mixed dried fruit, glace cherries which really needed to be used up, and orange and lemon peel.

Proved and ready to put in the oven

Hurray... just came out of oven.

Ahhhhh. It was worth it. Very soft and beautifully bouncy dough.
Rich and sweet. I'm so happy about the result. :)


Oh, by the way,............Look, NO soggy bottom.

Wednesday, 24 October 2012

Ruislip woods Blackbery Muffin


Here are the muffins made with the lovely blackberries from our local woods in Ruislip.
There were absolutely loads of them in September and early October. These little gems are fantastic for muffins. The recipe for them is the same as summer forest berry muffins. I picked so many of them and wondered what to do with the last of the berries after making muffins. They wouldn't keep so long in the fridge. So, I froze them. Freezing soft berries is a bit tricky as they stick together. I used a polystyrene sheet for the first freezing.
You know the tray like sheet which comes with ready meal pizzas from the supermarket. I simply place the berries on the polystyrene pizza tray and pop it in the freezer. Make sure they are not really squashed together. When they are frozen, put them altogether in a container to keep then in the freezer. They are all individually frozen... like little precious stones. When you make muffins with these frozen berries, put them into the dry mixture first then mix with wet ingredients. This process has to be done quickly when the berries are still frozen. Do not defrost the berries. If you do, the muffins will be a purple mess.... Anyway, these frozen berries are very useful. Great addition to yoghurt, desert, trifle, etc.


Tuesday, 9 October 2012

Banana & Cocoa Cake

This banana cake has a very different texture compared to the one I normally bake. Very spongy and light... and yet very moist. Is it because I changed some ingredients or method? I'm not so sure. One thing I did very differently from my normal method was to use an electric hand blender which I use for making smooth soup. Blitz ..... By  mixing the wet ingredients by blender, the mixture became very fluffy and smooth.... like a banana smoothy texture. Anyway, this cake contains sunflower oil instead of butter or margarine, so it keeps the moisture longer... so I heard. 

Ingredients
  • 175g caster sugar
  • 175g plain flour
  • 2 tsp baking powder
  • 4 tbsp cocoa powder
  • 80ml sunflower oil
  • 70ml milk
  • 2 eggs
  • 1 tsp lemon juice
  • 2 bananas (200g ish)
For crumble topping
  • 30g Plain Flour  
  • 15g Granulated Sugar (or Demerara Sugar) 
  • 15g Butter (or low-fat margarine) 
  • walnuts  
Method
  1. Heat oven to 160C/140C fan/gas 3. Grease and line a 2lb loaf tin with baking parchment.
  2. Mix the sugar, flour, baking powder, and cocoa in a large bowl.
  3. Mash the banana in a bowl and add oil, milk, lemon juice and eggs. Then mix thoroughly with the electric hand blender.
  4. Put the wet mixture into the dry mixture and mix gently.
  5. Pour the mixture in the tin and sprinkle the crumble topping. (put the all ingredients for the topping in a bowl and make a breadcrumb like texture using your finger tips)
  6. Bake for 50 minutes or until a skewer inserted comes out clean.  


Friday, 5 October 2012

Apple "Cake" Tatin


Good old British Cox apples are now in season. I love the sweet but slightly tangy flavour of Cox apples. They are great just as they are and fantastic for cooking. So, to celebrate British Cox,
I wanted to bake "Tart Tatin"... Well...it's not a tart, it's a cake. So, it's upside-down apple caramel cake. :) Enjoy the fresh flavour of apple and sticky caramel.

Ingredients 
  • 4 oz plain flour 
  • 4 oz soft brown sugar 
  • 4 oz low-fat margarine  
  • 1 teaspoon baking powder
  • 1 teaspoon ground cinnamon
  • 2 eggs
  • 1/2 Vanila extract 
  • 2 apples sliced
  • Caramel: 85g Caster sugar + 1 tablespoon water  

Method

Making Caramel sauce 

  •  Warm the pan gently over a medium heat for a few moments then place white caster sugar in the pan, still over a medium heat. Leave the sugar and keep an eye on it, until it begins to melt. After about 5 minutes the sugar will start to melt and turn liquid around the edges.  Do not stir!
  •  Give the pan a good shake and leave it again until about a quarter of the sugar has melted. Using a wooden spoon, give it a gentle stir and continue to cook until the sugar has transformed from crystals to liquid and is the colour of dark runny honey – a dark amber colour.
  •  Take the pan off the heat and add 1 tablespoon of tap-hot water – the caramel will splutter and steam so protect your hands with a cloth and take care. Stir well – you may need to return the pan to a gentle heat to re-melt any lumps of caramel that have formed. The caramel is now ready to use.


  1. Preheat oven to 170 °C.  Place greaseproof paper in the cake tin.
  2. Put all the ingredients, apart from apples and sugar for caramel, in a bowl and mix with the electric whisk.
  3. Make caramel sauce ( see above for the method)  
  4. Pour the caramel sauce into the cake tin.
  5. Place the sliced apples and then pour the cake mixture on top.
  6. Bake in the pre-heated oven for about 40 minutes. When the cake cools down turn the cake tin upside down and gently peel away the greaseproof paper.


Thursday, 20 September 2012

Very Sticky Upside-down Banana Ginger Cake

Here is a banana cake with a bit of attitude. 2 whole bananas are in a cake without being mashed. 
So if you like banana, this is your cake. :)   
Making caramel is a really tricky job and I made a very sticky mess in a sauce pan the first time I tried it. Unfortunately most of the unsuccessful caramel went down the sink :(   I think the key to making a good caramel is the timing.  You need patience to wait for the sugar to melt and quick action when adding water at the right time. When you have made a good runny caramel to cover the bottom of the cake tin, you are almost there. Making the sponge is the easy bit.  

Ingredients 
  • 200g plain flour 
  • 150g soft brown sugar
  • 2 teaspoon baking powder
  • 1 teaspoon ground ginger
  • 1 teaspoon ground cinnamon
  • 80ml vegetable oil
  • 150ml milk
  • 1 egg
  • 2 Bananas sliced
  • Caramel: 85g Caster sugar + 1 tablespoon water
Method
1.     Preheat oven to 170 °C.  Place greaseproof paper at the bottom of the cake tin.

2.     Mix the dry ingredients in a bowl.

3.     Mix the wet ingredients in a separate bowl.

4.     Stir the wet mixture into the dry mixture. Mix everything together gently.

5.     Make caramel sauce: 
    •  Warm the pan gently over a medium heat for a few moments then place white caster sugar in the pan, still over a medium heat. Leave the sugar and keep an eye on it, until it begins to melt. After about 5 minutes the sugar will start to melt and turn liquid around the edges.  Do not stir.
    •  Give the pan a good shake and leave it again until about a quarter of the sugar has melted. Using a wooden spoon, give it a gentle stir and continue to cook until the sugar has transformed from crystals to liquid and is the colour of dark runny honey – a dark amber colour.
    •  Take the pan off the heat and add 1 tablespoon of tap-hot water – the caramel will splutter and steam so protect your hands with a cloth and take care. Stir well – you may need to return the pan to a gentle heat to re-melt any lumps of caramel that have formed. The caramel is now ready to use.


6.     Pour the caramel sauce into the cake tin.

7.     Place the sliced banana and then pour the cake mixture on top.

8.     Bake in the pre-heated oven for about 40 minutes. When the cake cools down turn the cake tin upside down and gently peel away the greaseproof paper.


Friday, 7 September 2012

Lemony Cupcakes

Believe it or not, these are my first ever attempt at making cupcakes. I had never made them before.
Well... I've been baking a lot of muffins by now. I must admit almost an obsession as I kept baking muffins in the last few months. Yesterday, I ran out of vegetable oil which I believe is an essential ingredient for making muffins. I think vegetable oil gives muffins a very light fluffy texture compared with using butter or margarine. So, no vegetable oil, but I couldn't be bothered rushing to the supermarket just for that.
So, plan B... Ah.. Why not cupcakes? Cupcakes are cakes, not muffins, so they say... They have a different texture altogether. Therefore, cupcakes require different ingredients and a different method. Cupcakes need butter or margarine instead of a liquid form of fat, and more eggs. For making cupcakes, I can use an electric whisk.
Result: The texture is quite dense and very moist. They are cakes after all. They should be like that, shouldn't they?  I love a lemony flavour, so I made a mixture of lemon curd, extra lemon juice and icing sugar for the top of each cupcake.


 Ingredients


  • 125 g Self-Raising Flour  (or Plain Flour + 1tsp Baking Powder)
  • 125 g Caster Sugar
  • 125 g Unsalted Butter or Margarine
  • 2 Medium Eggs
  • ½ Teaspoon Vanilla Extract
  • 2 Tablespoon Milk 
  • Lemony mixture ( Lemon Curd + Icing Sugar + Lemon Juice )


Method


  1. Preheat the oven to 180 °C  (Electric oven | Electric fan oven 160°C | Gas Mark 4) and place paper cases into a muffin tin.
  2. Using an electric whisk, food processor or wooden spoon, beat the butter and sugar until very light and fluffy.
  3. Add the eggs one at a time, beating each one in well before adding the next. Add the vanilla essence if using.
  4. Carefully fold in the flour and baking powder with a spatula.
  5. Bake in the oven for 10 - 20 minutes. After 10 minutes, check to see if the cupcakes are ready by inserting a cocktail stick into one of the cupcakes. If it comes out dry then the cupcakes are done. If not, then put them back in the oven for a few minutes more. Don't overcook the cupcakes otherwise they will dry out. Lift the cupcakes out of the muffin tin and leave to cool on a wire rack.
  6. Make the lemony mixture and pour on each cupcake.


Tuesday, 4 September 2012

Lemony Golden Syrup Muffins

Golden syrup is a kind of comfort food, isn't it? So, here are the muffins which make you feel "ahhhh". I was looking for a muffin recipe and found one in Nigella.com. Her recipe suggests adding extra golden syrup to the middle of each muffin, but I decided to pour "lemony golden syrup" into each muffin instead. It makes the muffins lovely and moist with a hint of lemon flavour. :)  


Ingredients 

  • 200g flour
  • 50g caster sugar
  • 2 teaspoons baking powder
  • ¼ teaspoon salt
  • 3 tablespoons (90g) golden syrup
  • 1 dash of vanilla extract
  • 1 egg
  • 50ml vegetable oil
  • 130 ml milk
  • golden lemon syrup (golden syrup + lemon juice) 

Method

1.     Pre heat the oven, 200  (190 fan oven)
2.    Mix all the dry ingredients together in a bowl.
3.    Mix all the wet ingredients together in a separate bowl.
4.    Add the wet ingredients to the dry ingredients and lightly mix.
5.    Spoon the mixture into the muffin cases and bake them for 20 minutes.
6.    When the muffins are baked, poke a few holes into each muffin with a very fine skewer and pour the golden lemon syrup into each muffin.

Serve while still hot, with a cup of tea or coffee. 
They would also be great turned into a pudding with a big dollop of custard.


Monday, 20 August 2012

Lemon Drizzle Muffins

Yes, I did it. :)  I baked 8 Lemon Drizzle Muffins, 8 Mixed Berry Muffins, 8 Double-Chocolate & Banana Muffins and 24 Oat & Fruit Cookies in 2 hours including washing up this morning.  Phew... 
I was preparing for a coffee break party for friends this afternoon. Muffins should be eaten on the day baked, ideally, so I decided to bake them all in the morning of the event. It was fun. :)  
I added some pieces of chocolate to my Banana and Cocoa Muffins to make them more chocolatey. 
Here is my new recipe for Lemon drizzle muffins. I put lemon curd in the middle of each muffin to make them even more lemony. :) 


Ingredients 

  • 200g Plain Flour
  • 150g Sugar
  • 2  tsp Baking Powder
  • ¼  tsp Salt
  • 100ml Milk 
  • 1 tsp Lemon juice
  • 50ml Vegetable Oil
  • 1 Egg
  • Vanilla extract
  • 1 tsp Lemon curd for each muffin
  • Lemon syrup ( Juice of one lemon + 1 Tbsp Sugar)   

Method 

  1. Preheat oven to 200 C / Gas 6 and add paper cases to a muffin tray.
  2. Measure out flour, sugar, baking powder and salt in a large mixing bowl and mix the dried ingredients well.
  3. Measure milk and oil in a large measuring jug. Add egg, lemon juice and vanilla, then whisk well.
  4. Add the wet mixture (3) into the dry mixture (2).  Stir until just combined (mixture will be lumpy).        Do NOT over mix!
  5. Add the mixture up to halfway in each muffin case, then drop 1 tsp of lemon curd into the centre of each muffin. Gently top up the muffin mixture to cover the lemon curd.
  6. Bake for 20 minutes or until golden brown on top.   
  7. Make 6 holes in each muffin with a fine skewer.
  8. Make a syrup with lemon juice and sugar and pour over the muffins.

Tuesday, 24 July 2012

Oat and Fruit Cookies


Fancy a cuppa? My Oat and Fruit cookies may be lovely company with a cup of tea. 
Crunchy outside and slightly soft inside .... that's how I like them, but you can make them really crunchy by baking them a bit longer if you like. A lovely cinnamon aroma spreads in the kitchen when they are being baked. The dough is very sticky, so using your hands to shape them is a messy job. I used 2 spoons to make a round-ish shape and dropped it on the baking tray. I quite like this rustic look. :) 


Ingredients   


  • 3 oz Brown Sugar 
    One of the cookies turned out a heart shape... awwww.
  • 4 oz Caster Sugar
  • 4 oz  Unsalted Butter (or Low-Fat Margarine if you prefer) 
  • 6 oz Plain Flour
  • 5 oz Rolled Oats
  • 5 oz Dried Fruit (and/or some nuts)
  • 1 Egg
  • 1/2 tsp Cinnamon 
  • 1/2 tsp  Baking Powder 
  • 1/2 tsp  Salt    

Method

  1. Heat the oven to 170°c.
  2. Put the brown sugar, caster sugar and butter into a mixing bowl and whisk them together until it has become smooth.
  3. Add all the rest of the ingredients into the bowl with the butter and sugar mixture.
  4. Mix everything together so that it is all evenly distributed. Then shape it into a ball with your hands.
  5. Lightly flour your work surface and then roll out the ball of cookie dough to a thickness of about 4mm. 
  6. Using a cookie cutter, cut out the cookies and put them onto a non-stick baking tray (or one lined with greaseproof paper)
  7. Put the cookies into the 170°c oven and bake them for 15 minutes.
  8. When they are cooked, remove them from the oven and leave them to cool on the baking tray for 3 minutes or so before putting them on a wire rack and allow them to cool to room temperature.


Saturday, 7 July 2012

Summer Forest Berry Muffins

We have been having really rainy summer this year in Britain. Where has summer gone? 
So, here is another rainy weekend, but still I can enjoy baking. :)
First, I baked a batch of flapjack (click for the recipe) with walnuts and prunes. While the flapjack was baking in the oven, I prepared the muffins. I really love fresh blueberry muffins, but here are "Summer Forest Berry Muffins" which are inspired by my favourite English Summer Pudding, which includes several kinds of berries. Yes, you can see lots of berries in the muffins. I used frozen mixed berries, raspberries, blackberries, blueberries, redcurrants and blackcurrants. It's quite handy keeping a bag of frozen mixed berries in the freezer as you can get almost the same lovely juicy flavour as fresh berries.... and you can bake whenever you feel like it without rushing to the supermarket. The only thing you have to remember using frozen berries is NOT to defrost the berries before mixing the batter. Put the frozen berries straight from the freezer into the dry mixture, them add the wet mixture as usual. As I love berries I put about 170g of berries in this mixture... and they were delicious!! But you may not need that much. 125-150g of frozen berries would be just lovely! 

Ingredients 
  • 200g Plain Flour
  • 150g Sugar
  • 2 tsp Baking Powder
  • ¼ tsp Salt
  • 100ml Milk
  • 75ml Vegetable Oil  (5 Tbsp)
  • 1 Egg
  • ¼ tsp Vanilla Extract 
  • 1 tsp  Lemon juice 
  • 125g Frozen mixed berries   

Method
  1. Preheat oven to 200 C / Gas 6 and add paper cases to a muffin tray.
  1. Measure out flour, sugar, baking powder and salt in a large mixing bowl and mix well. Then add the frozen mixed berries. (DO NOT defrost the berries. When the berries are added do not mix until the wet mixture is added)  
  1. Measure milk and oil in a large measuring jug. Add egg, lemon juice and vanilla, then whisk well.
  1. Add the wet mixture (3) into the dry mixture (2).  Stir until just combined. The mixture will be lumpy.     Do NOT over mix.    Bake for 20 minutes or until golden brown on top