Friday, 19 July 2013

Summer berry cheese cake pot


We've been enjoying a proper sunny summer this year in the UK for a change.
It's great to see blue sky and sun shining everyday. :)  Fantastic for a BBQ in the garden, but not for baking cakes in a small kitchen like I have.  The heat is just so unbearable.
Ah, but I've got a banana and chocolate cake in the freezer and I've found some frozen mixed berries.
Now, all I have to do is make a cheese cream filling and assemble these ingredients together in tumblers to create this cool summer desert.
They look quite impressive but are really easy to make.


Ingredients 
  • some left over cakes (chocolate cakes, brownies go well)
  • some frozen mixed berries
  • a few drops of raspberry jam (lemon curd is also good)
  • 200g cream cheese
  • 100g creme fraiche 
  • 1 Tbsp icing suger 
  • 1 tsp vanilla extract or paste
  • grated chocolate for garnish 

Method
  1. Mix cream cheese, creme fraiche, vanilla and icing sugar until smooth. 
  2. Cut the cake in pieces and place in the bottom of the tumblers and drop some jam on top.
  3. Drop the cream cheese filling and then add some berries. 
  4. Make layers of berries and cream cheese filling.


Thursday, 27 June 2013

Walnut bread


I love walnut bread. I used to run to my favourite bakery in Japan at the time when the walnut bread came out of the oven.  This has a very crusty crust with flaky and slightly bitter walnuts.
As you munch, the walnuts crumble away. I'm more than happy with this freshly baked and still warm walnut bread with some chunky slices of gorgonzola cheese. :)
To make a rustic texture and flavour, I used wholemeal and rye flour in my bread mixture.
You can add as many walnuts as you like as long as the dough can hold them, but I used about 60g of walnuts for this loaf.


Ingredients 

  • 200g strong white + 200g strong wholemeal + 100g rye flour 
  • 7g sachet fast-action dried yeast
  • 1 tsp salt
  • up to 350ml lukewarm water
  • a little sunflower oil for greasing
  • 50-100g crushed walnuts
Method
  1. Make the dough by tipping the flour, yeast and salt into a large bowl and making a well in the middle. Pour in most of the water and use your fingers or a wooden spoon to mix the flour and water together until combined to a slightly wet, pillowy, workable dough - add a splash more water if necessary. Tip the dough onto a lightly floured surface and knead for at least 10 mins until smooth and elastic. This can also be done in a tabletop mixer with a dough hook. Place the dough in a clean oiled bowl, cover with cling film and leave to rise until doubled in size.
  2. Heat oven to 220C/ fan 200C/ gas 7. Knock back the dough by tipping it back onto a floured surface and pushing the air out. Knead crushed walnuts into the dough until the walnuts have integrated into the dough evenly. Mould the dough into a rugby ball shape and place it on a baking tray. Cover with a clean tea towel and leave to prove for 30 mins. Dust the top of the loaf with a little more flour and slash the top with a sharp knife if you want.
  3. Pour hot water onto the bottom of the oven or into a dish at the bottom of the oven to create steam. 
  4. Bake the bread for 15 mins, then reduce the heat to 190C/fan 170C/gas 5 and continue to bake for 30 mins until the loaf sounds hollow when removed from the oven and tapped on the base. Leave the bread on a wire rack to cool completely.

Thursday, 30 May 2013

Chocolate & Orange Cake

This chocolate cake is very easy to make. I could have put the batter into two cake tins and made a chocolate victoria sandwich, but I decided to put the batter into one cake tin for a nice thick cake. 
There is an range flavour all through the cake.  If you like a chocolate and orange combo, this is the cake for you. Certainly it's for me, too. :) 
The secret of evenly baked cake is putting an oven tray in the oven when preheating the oven. 
Then the cake goes on top of the piping hot oven tray. This helps to bake the cake from the bottom very well.    So, no soggy bottom. :) 


Ingredients 
  • 50g good quality cocoa powder
  • 6 Tbsp boiling water
  • 3 Tbsp milk
  • 3 eggs
  • 175g self-raising flour
  • 1 tsp baking powder
  • 100g soft butter or low-fat spread
  • 300g caster sugar 
  • zest of 1 orange
for icing and filling
  • good quality marmalade mixed with warm water 
  • icing sugar
  • cocoa powder
  • orange zest
Method

  1. Preheat the oven to 180C/350F/Gas 4 (fan oven 175C) and grease and line a 20cm/8in round cake tin with baking parchment.
  2. Put the cocoa powder and boiling water into a large bowl and mix well to make a paste. Add the remaining ingredients and beat again until combined. This can also be done in a food processor, but take care not to over whisk.  Bake for about 40 minutes, then turn the temperature down to 160C and bake for a further 10-20 minutes or until it is well risen and shrinking away from the sides of the tin.
  3. Meanwhile, for the filling, mix marmalade with some warm water. For the icing, mix icing sugar, orange zest and cocoa powder with tiny drops of water to make a spreadable consistency.
  4. Once baked, remove the cake from the oven and allow to cool completely. Spread the top of the cake with the marmalade and water mixture. Then pour the chocolate icing to cover the cake. 

Monday, 27 May 2013

No-Knead Mediterranean Olive Bread

This is basically ciabatta bread .... well, at least as far as the texture is concerned, this is ciabatta bread. 
I had never tried to make ciabatta bread as it seemed to be a very complicated and messy job. 
However, when I came across this "no-knead" recipe, I thought I would have a go. It was so easy to make. 
It doesn't need any effort at all, it just needs plenty of time. I left the dough overnight for 14 hours before shaping the dough into a flat rugby ball. The result was so much better than I expected. The loaf has a bubbly interior which ciabatta bread should have, and a very moist and chewy texture. 
It would be quite impressive if you presented this at a dinner party saying "I baked this, actually." 


Ingredients 

  • 400g strong white flour 
  • 1 tsp salt
  • 1 tsp dried thyme
  • 1 tsp fast-action dried yeast
  • zest of 1 lemon
  • 120g your choice of olives
  • 1 Tbsp (15ml) olive oil
  • 350ml water


Method 
  1. Mix flour, salt, and yeast in a bowl.
  2. Add thyme and lemon zest and mix.
  3. Add roughly chopped olives to the dried mixture and mix.
  4. Pour olive oil and water and mix well with a wooden spoon or spatula to form a ball in the bowl.
  5. Cover the bowl with cling film and leave for 12 to 24 hours.  
  6. Flour the worktop and tip the dough out of the bowl and shape it as a ball, but you don't need to knead nor knock down the air.
  7. Either cut the dough in two and make two oval shapes or simply keep it as one long oval shape.
  8. Place the dough on parchment paper and cover the dough with a tea towel and prove the dough for 1 ½ hour.
  9. Meanwhile, put a clay pot with a lid (or any baking pot with a lid) in the oven and preheat the oven as hot as you can. I preheated to 230C .
  10. Take the hot baking pot out of the oven and place the dough in the pot with the parchment paper and put the lid on.
  11. Place the pot in the oven and bake for 25 minutes. Then take the lid off and bake for another 10 minutes.


Monday, 13 May 2013

Revised: Coffee and Walnut Cake

I posted coffee and walnut cake before but this is a revised version.  Classic coffee and walnut cake is a must-have item in the proper afternoon tea menu.  It can be elevated by decorating with coffee butter cream and even made in 2 to 3 layers.  But my recipe is a very simple home-eating version. I made simple coffee icing by mixing strong coffee and icing sugar.  You can make this with instant coffee powder, icing sugar and water.   Sometimes, I find the simple way is the best. :) 


Ingredients
  • 6oz (175g) self-raising flour  
  • 1 level teaspoon baking powder
  •  6oz (175g) low-fat spread (or butter)
  •  2 large eggs
  •  6oz (175g) light brown muscovado sugar
  •  2-3 rounded tablespoons instant espresso coffee powder 
  •  3 Tbsp milk or water
  •  50g walnuts, finely chopped 

For topping
  • icing sugar
  • espresso coffee 
  • 8-10 walnut halves

 Method
  1. Pre-heat the oven to 170ºC, gas mark 3
  2. Sift the flour and baking powder into a roomy mixing bowl. Then add the low-fat spread, eggs, sugar and coffee powder. Mix them by using an electric hand whisk for about 1 minute. You may need up to 3 Tbsp milk or water to make the mixture into a smooth, creamy and dropping consistency.
  3. Fold the chopped nuts into the mixture.
  4. Pour the mixture into the prepared cake tin and bake in the oven for about 30-40 minutes. Remove the cake from the oven and cool down.
  5. While the cake is cooling, make up the topping. In a small bowl combine the icing sugar, coffee powder and some water.
  6. When the cake is cool, decorate the cake with the coffee icing. 

Wednesday, 1 May 2013

Twister Bread


This is a very pretty loaf to look at and delicious to eat. I got the original recipe from Lorraine Pascale's Twister Bread. It's worth looking at her video recipe for the technique of twisting the dough on the BBC Food site.
As always, I twisted the ingredients for my convenience and availability of my cupboard stock.
Basically, I used olive oil and grated Italian hard cheese instead of sesame oil and poppy seeds. So, somehow, my version  has an Italian touch.  I used Grana Padano cheese. Simply that was in my fridge when I baked this loaf.  I would say any hard cheese could work. Parmesan cheese would be the obvious option, so I put that down in my recipe. I normally prove twice when I prepare bread, but for this recipe, I only proved once following her technique.
I loved the crunchiness of the crust and the softness of the crumb. The aroma from the oven when I was baking this loaf was heavenly...


Ingredients
  • 400g strong white bread flour 
  • 100g wholemeal bread flour
  • 1 tsp salt
  • 7g sachet of fast action dried yeast
  • 1 tsp caster sugar
  • 1 tbsp olive oil
  • 300ml warm water
  • 1 tbsp olive oil (to spread on the dough)
  • 50g finely grated parmesan cheese (or any other hard cheese) 

Method

  1. Put the flours, salt, sugar and yeast into a large bowl, mix a bit and then make a hole in the middle. Add in 300ml of warm water. You may need more water to make a soft dough. Then mix everything together until combined. 
  2. Then tip the dough onto a floured surface and knead it for 10 minutes (or five minutes if kneading in a food mixer fitted with a dough hook). To test and see if it has been kneaded enough, form the dough into a ball with a nice taut top. Dip your finger in the flour and then prod the side of the dough making an indent. The indent should spring back all the way and almost disappear if it is ready.
  3. Put some more flour on the surface and then, using a rolling pin, roll the dough out into a long rectangle. If it is too springy to roll then cover it with a tea towel and leave for five minutes or so. That way the stretchy gluten strands in the bread can relax a bit which will make it easier to roll out.
  4. Using a pastry brush, brush the top of the dough with the olive oil going right up to the edges and then sprinkle the parmesan cheese evenly all over. Then cut the dough into six wide strips down the length.
  5. Keeping the strips lined up together, twist each one up like a twisted breadstick or cheese straw. Once they are all twisted, stack them into a bundle and pick them all up in one go. Then twist them together so you have a long thick twisted rope made up of the individual strands of bread. Try to twist evenly so the rope is an even thickness throughout.
  6. Then curve the bread into a ‘wreath’ shape and squish the ends together, sealing them with a bit of water. It does not have to be perfect, just as long as they are joined up. 
  7. Place the wreath on a baking sheet. Oil some cling film and use it to cover the dough, oiled side down, so it is airtight but with enough room for the dough to rise a little.
  8. Leave to prove for about 30 minutes. To test if it is ready for the oven (because the bread will not have doubled in size but probably grown by about half again), dust your finger with some flour and then make an indent in the side of the bread. The indent should spring back about half way. If the indent just stays there and does not really move very much, then it needs more time.
  9. When ready, place in the preheated oven (200C/400F/Gas 6)  to bake for 35 minutes.
  10. The loaf is cooked when it sounds hollow when tapped underneath. If not, then give it another five minutes or so in the oven. Once ready remove from the oven and serve. 

Tuesday, 30 April 2013

Onion and rosemary tear and share bread


This lovely tear and share bread looks great as well as tasting fab and goes with home-made soup very nicely. The original recipe was found in Sage and onion tear and share bread on BBC Food, and I adjusted it a bit for this post. I thought heating milk is a rather fiddly job, so I warmed the water in the kettle and poured the warm water over the cold milk. This made the milk and water mixture nice and warm.
Just be careful not to boil the water as this will make the liquid mixture too hat. The dough is really wet and sticky. If you have a mixer, let the machine to do the kneading. Well..., I don't.  So I got on with the job by hand. You could decrease the amount of milk from 150ml to 100ml and see how it goes.
I used rosemary instead of sage.  I simply didn't have sage at the time, and I think onion goes well with various herbs. You need to cook the onion patiently to bring out the natural sweetness to be almost like caramel. This bread has both sweet and savoury flavours; it's so good. You've got to try this. :)


Ingredients
  • 150ml whole milk, plus extra for glazing + 150ml warm water 
  • 400g strong white flour, plus extra for kneading
  • 7g sachet fast-action dried yeast
  • 1 tsp caster sugar
  • 1 tsp fine sea salt
  • 15g butter (or 1 Tbsp olive oil) 
  • 1 Tbsp sunflower oil (or olive oil), plus extra for greasing
  • 1 large onion, peeled and chopped
  • 1 garlic clove, crushed
  • fresh rosemary (or 15-20 sage leaves) chopped, and extra for garnish 
  • freshly ground black pepper 
     
     Method

  1. Warm up 150ml/5fl oz water and pour over cold milk  (This makes quite a wet dough. So, it could change to 100ml milk + 150ml water).
  2. Sift the flour into a large mixing bowl and stir in the yeast, sugar and salt.
  3. Make a well in the centre and stir in the water and milk with a large wooden spoon. Gather into a ball then turn out onto a lightly floured surface and knead for 10 minutes.
  4. Place the dough in an oiled bowl and cover loosely with oiled clingfilm. Leave to rise in a warm place for 45-60 minutes or until doubled in size.
  5. Meanwhile, melt the butter and oil in a large non-stick frying pan and fry the onion and garlic over a very low heat for 10 minutes, or until softened.
  6. Scatter the chopped rosemary (or sage) over the onions and cook for a further 2-3 minutes. Remove from the heat, season with lots of freshly ground black pepper and set aside to cool.
  7. When the dough has doubled in size, tip it back onto a floured surface and flatten with the palms of your hands. Spoon the onion mixture on top and knead for a couple of minutes until evenly incorporated. Sprinkle with a little extra flour if it becomes sticky.
  8. Divide the dough into eight and shape into neat balls by pulling the dough from the outside of the ball and pushing into the centre. Turn over with the ends underneath. Place the rolls in a circle on a large baking tray lined with greaseproof paper, making sure the dough balls are touching. Cover loosely with oiled cling film and leave to prove in a warm place for 45 minutes, or until doubled in size.
  9. Preheat the oven to 180C/350F/Gas 6.
  10. Brush the top of each roll lightly with milk and place some rosemary leaves (or a small sage leaf) on top. Brush with more milk and bake in the centre of the oven for 20 minutes, and decrease the temperature to 160c and bake for a further 20-15 minutes or until risen and golden-brown. Transfer to a wire rack and leave to cool a little before serving.


Friday, 26 April 2013

Vegan Chocolate and Walnut Cupcakes


Here are my very chocolatey vegan chocolate cupcakes with walnuts.
You can make them without walnuts if you prefer a smooth texture.

This cake mixture also works for a round cake tin for a birthday cake base. You will need a longer baking time of 40-45 minutes for one big round cake.  I made the round cake version with orange flavour by adding zest of one orange to the cake mixture.  I also spread a good orange marmalade in in the middle when the cake become cool enough to slice.
To add more indulgent chocolate flavour, you can decorate the cake with melted plain chocolate (don't use milk chocolate! It's a vegan cake after all. )

My vegan friend approved so I must have done the right thing. :)


Ingredients (12 cupcakes)

  • 200g (7 oz) self-raising flour 
  • 200g (7 oz) caster sugar
  • 50g cocoa powder
  • 1 teaspoon bicarbonate of soda (or baking powder)
  • 1/4 teaspoon salt
  • 5 tablespoons (74ml) vegetable oil
  • 1 teaspoon vanilla extract
  • 1 teaspoon lemon juice (or white vinegar)
  • 250ml (8 fl oz) water
  • 70g chopped walnuts


Method
  1. Preheat oven to 180 C / Gas 4. 
  2. Sieve together the flour, sugar, cocoa, bicarbonate of soda and salt. Add the oil, vanilla, lemon juice and water.  Mix together until smooth. Add walnuts.
  3.  Pour into prepared muffin tin and bake at 180 C for 20-25 minutes.
  4. Remove from oven and allow to cool.
  5. Decorate with cocoa icing (cocoa + icing sugar +water) and crushed walnuts. 


Thursday, 25 April 2013

Orange and Crème Fraîche Cupcakes

I really enjoyed the Sicilian oranges from my lovely Italian friend.
Here are the cupcakes which have orange zest in the cake mixture. I only used the zest of orange but the lovely orange flavour was certainly there in the cake. I used crème fraîche instead of milk for the cake mixture to compliment the fresh flavour of orange. They are really moist and have a light texture.

I'm not a "pretty cupcake" maker really but I just felt like making something a little fancier than my usual products.  So I decorated them with my take on "buttercream icing". I used crème fraîche. The common ratio between icing sugar and butter is 2:1. You also need milk to loosen the consistency of the frosting.
I replaced 25% of butter with crème fraîche, which I think provides a good balance for piping the frosting. You can replace butter with margarine if you really want to go for the low-fat option like I did.
Well, they tasted pretty good. :)


Ingredients

  • 6 oz low-fat spread  
  • 6 oz caster Sugar
  • 6 oz SR flour (or Plain flour + 1 tsp baking powder) 
  • 1 egg  (When I used 2 eggs, the cupcakes sank as a result of too much liquid.)
  • zest of 1 orange (or lemon)
  • 100ml crème fraîche

For crème fraîche frosting

  • 75g butter or margarine  
  • 25g crème fraîche
  • 200g icing sugar
  • ¼ tsp vanilla paste
  • zest of ½ orange  

 Method 
  1. Pre-heat the oven 160-180 °c.
  2. Put all ingredients in the food processer and mix well. (all-in-one method)     To make a dropping consistency, you may need to add more crème fraîche.
  3. Bake in the oven for 25-30 minutes.
  4. When the cupcakes are baked, let them stand for 5 minutes, then turn out to cool.
  5. Decorate with lemon juice + icing sugar mixture or pour a drop of crème fraîche on top to make the cupcakes into a dessert. If you prefer, you can make crème fraîche frosting to decorate them.

Tuesday, 23 April 2013

Vegan Carrot Cupcakes


Ingredients (12 cupcakes)
  • 175 g dark brown soft sugar, sifted 
  • 200 g self-raising flour
  • 1 teaspoon baking powder
  • 3 teaspoons mixed spice (or cinnamon + ginger)
  • 70 ml sunflower oil
  • 1 teaspoon lemon juice
  • grated zest of 1 orange
  • 200 g carrots, peeled and coarsely grated
  • 175 g dried mixed fruit
  • 200ml water
  • 1 Earl Gray tea bag

Method
  1. Boil the water and pour over dried fruit and a Earl Gray tea bag. Soak the dried fruit in the hot tea for 2 hours.
  2. Pre-heat the oven to gas mark 3, 325°F (170°C).
  3. Mix the carrot, orange zest, dried fruit with tea and oil.
  4. Then sift together the flour, baking powder and mixed spice into the bowl.
  5. Stir all this together, then pour the mixture into the prepared muffin tin and bake in the oven for 30-35 minutes.
  6. When the cupcakes are completely cold decorate with creme fraiche and icing sugar topping and sprinkle with cinnamon. 


Monday, 22 April 2013

Carrot Cupcakes

Here are my humble carrot cupcakes with a little bit of flair.
My recipe was inspired by Delia's Low-fat Moist Carrot Cake. I adjusted her recipe for cupcakes and used half-fat crème fraiche, so they are even more low-fat.  Juicy fruit and crunchy walnuts give these cupcakes a lovely flavour and texture. As you expect, grated carrot keeps the cupcakes very moist. 
Shall I put the kettle on?  

Ingredients (12 cupcakes)
  • 6 oz (175 g) dark brown soft sugar, sifted
  • 2 large eggs at room temperature
  • 100 ml sunflower oil
  • 7 oz (200 g) self-raising flour
  • 1 level teaspoons baking powder
  • 3 teaspoons mixed spice (or cinnamon + ginger)
  • grated zest 1 orange
  • 7 oz (200 g) carrots, peeled and coarsely grated
  • 3 oz dried mixed fruit + 3 oz walnuts 
     For the topping
  • 200 g crème fraiche
  • 15 g caster sugar
  • 1/2 teaspoons vanilla paste
  • 1 teaspoon ground cinnamon, plus a little extra for dusting

Method 

  1. Pre-heat the oven to gas mark 3, 325°F (170°C).
  2. Begin by whisking the sugar, eggs and oil together in a bowl using an electric hand whisk for 2-3 minutes.
  3. Then sift together the flour, baking powder and the mixed spice into the bowl.
  4. Stir all this together, then fold in the orange zest, carrots, dried mix fruit and chopped walnuts. 
  5. Pour the mixture into the prepared muffin tin and bake on the centre shelf of the oven for 25-30 minutes, until they are well risen and feels firm and springy to the touch when lightly pressed in the centre.
  6. While the cupcakes are cooking, make the topping by mixing all the ingredients in a bowl until light and fluffy, then cover with clingfilm and chill for 1-2 hours or until needed.
  7. When the cupcakes are completely cold, remove them from the tin, spread the topping over and dust with a little more cinnamon.

Saturday, 20 April 2013

Sicilian Orange Cake


Juicy, sweet and full of flavour. Sicilian oranges are the best. 
My beautiful Italian friend Giacoma brought lovely oranges from Sicily. :) So I baked this cake to enjoy the taste of sunshine. My recipe was inspired by Rick Stein's recipe. It's a simpler and smaller version of his with a little adjustment. Very moist and full of flavour. 

Ingredients 
  • 6 oz lightly salted butter 
  • 6 oz caster sugar
  • 2 large eggs
  • zest of 1 orange
  • 6 oz self-raising flour
  • 60ml freshly squeezed orange juice
  • for icing:  80g icing sugar + 4 teaspoons freshly squeezed orange juice
Method 
  1. Preheat the oven to 170C/gas mark 3. Grease and line a 20cm clip-sided round cake tin with non-stick baking paper.
  2. Using an electric whisk, cream the butter and sugar together for 4-5 minutes until very pale.
  3. Beat in the eggs, one at a time, beating well between each one, if necessary adding a spoonful of flour with the last egg to prevent the mixture from curdling.
  4. Beat in the orange zest. Add the flour all at once and mix in well, then slowly mix in the orange juice.
  5. Spoon the mixture into the tin and bake on the middle shelf of the oven for 40-55 minutes or until a skewer, inserted into the centre of the cake, comes out clean. If it starts to brown too quickly, cover loosely with a sheet of lightly buttered foil.
  6. Leave the cake, in its tin, to cool on a wire rack, then carefully remove the sides and base of the tin and peel off the paper. Put it onto a serving plate.         
  7. Sift the icing sugar into a bowl and stir in the orange juice until you have a spreadable consistency. Spread it over the top of the cake, letting it drip down the sides, and leave to set.

Friday, 12 April 2013

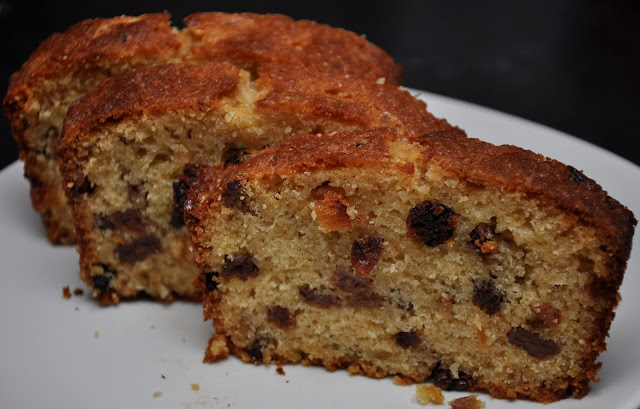
Easy Fruit Cake


This is a very easy fruit cake. Just remember to soak the dried fruit with liquid overnight. I used lemon juice and water, but apple juice is a very nice alternative. The cake is very moist as you would expect.
I made fruit cake in a hurry without soaking the other day and the cake turned out really dry.
So, using "juicy" dried fruit is definitely the key.


Ingredients
  • 6 oz low-fat spread (or butter)
  • 6 oz caster sugar
  • 6 oz self-raising flour (or plain flour + 2tsp baking powder)
  • 6 oz dried mixed fruit  
  • 2 eggs
  • zest of 1 lemon 
  • juice of 1 lemon
  • 30ml water or apple/orange juice
Method
  1. Soak the dried fruit and lemon zest with lemon juice and water overnight.
  2. Pre-heat the oven to 170 °c  (160 °c fan) 
  3. Put low-fat spread (or butter), sugar, flour and eggs in a food processer and mix well.  I often use an electric hand mixer.
  4. Gently fold the soaked dried fruit and the juice into the mixture. 
  5. Pour the mixture into the prepared loaf tin.
  6. Bake it in the oven for about 50 minutes until a skewer comes out clean from the cake. 
  7. When the cake is baked, let it stand for 5 minutes, then turn it out onto a plate.